 Advanced Tables now allows your users to manage which view they would like to be their default view for each table. When a view is a default it will be automatically loaded when the resource/table is first opened after logging in.
Updating to the Managed Default Views Beta
-
Update to the beta
If you are on version 3.8 and only want to experiment with Managed Default Views, update your
composer.jsonfile to:If you want to experiment with Managed Default Views, Multi-Sort, and Advanced Indicators, update yourcomposer.jsonfile to: -
Publish and run the migrations:
-
If you are using multi-tenancy run the following command to add the appropriate constraints. If not, you can skip this:
-
Compile assets
After updating run
npm run buildandphp artisan filament:upgrade. -
Enable Managed Default Views
Managed Default Views are disabled by default. To enable, add
managedDefaultViewsEnabled()to your panel provider:
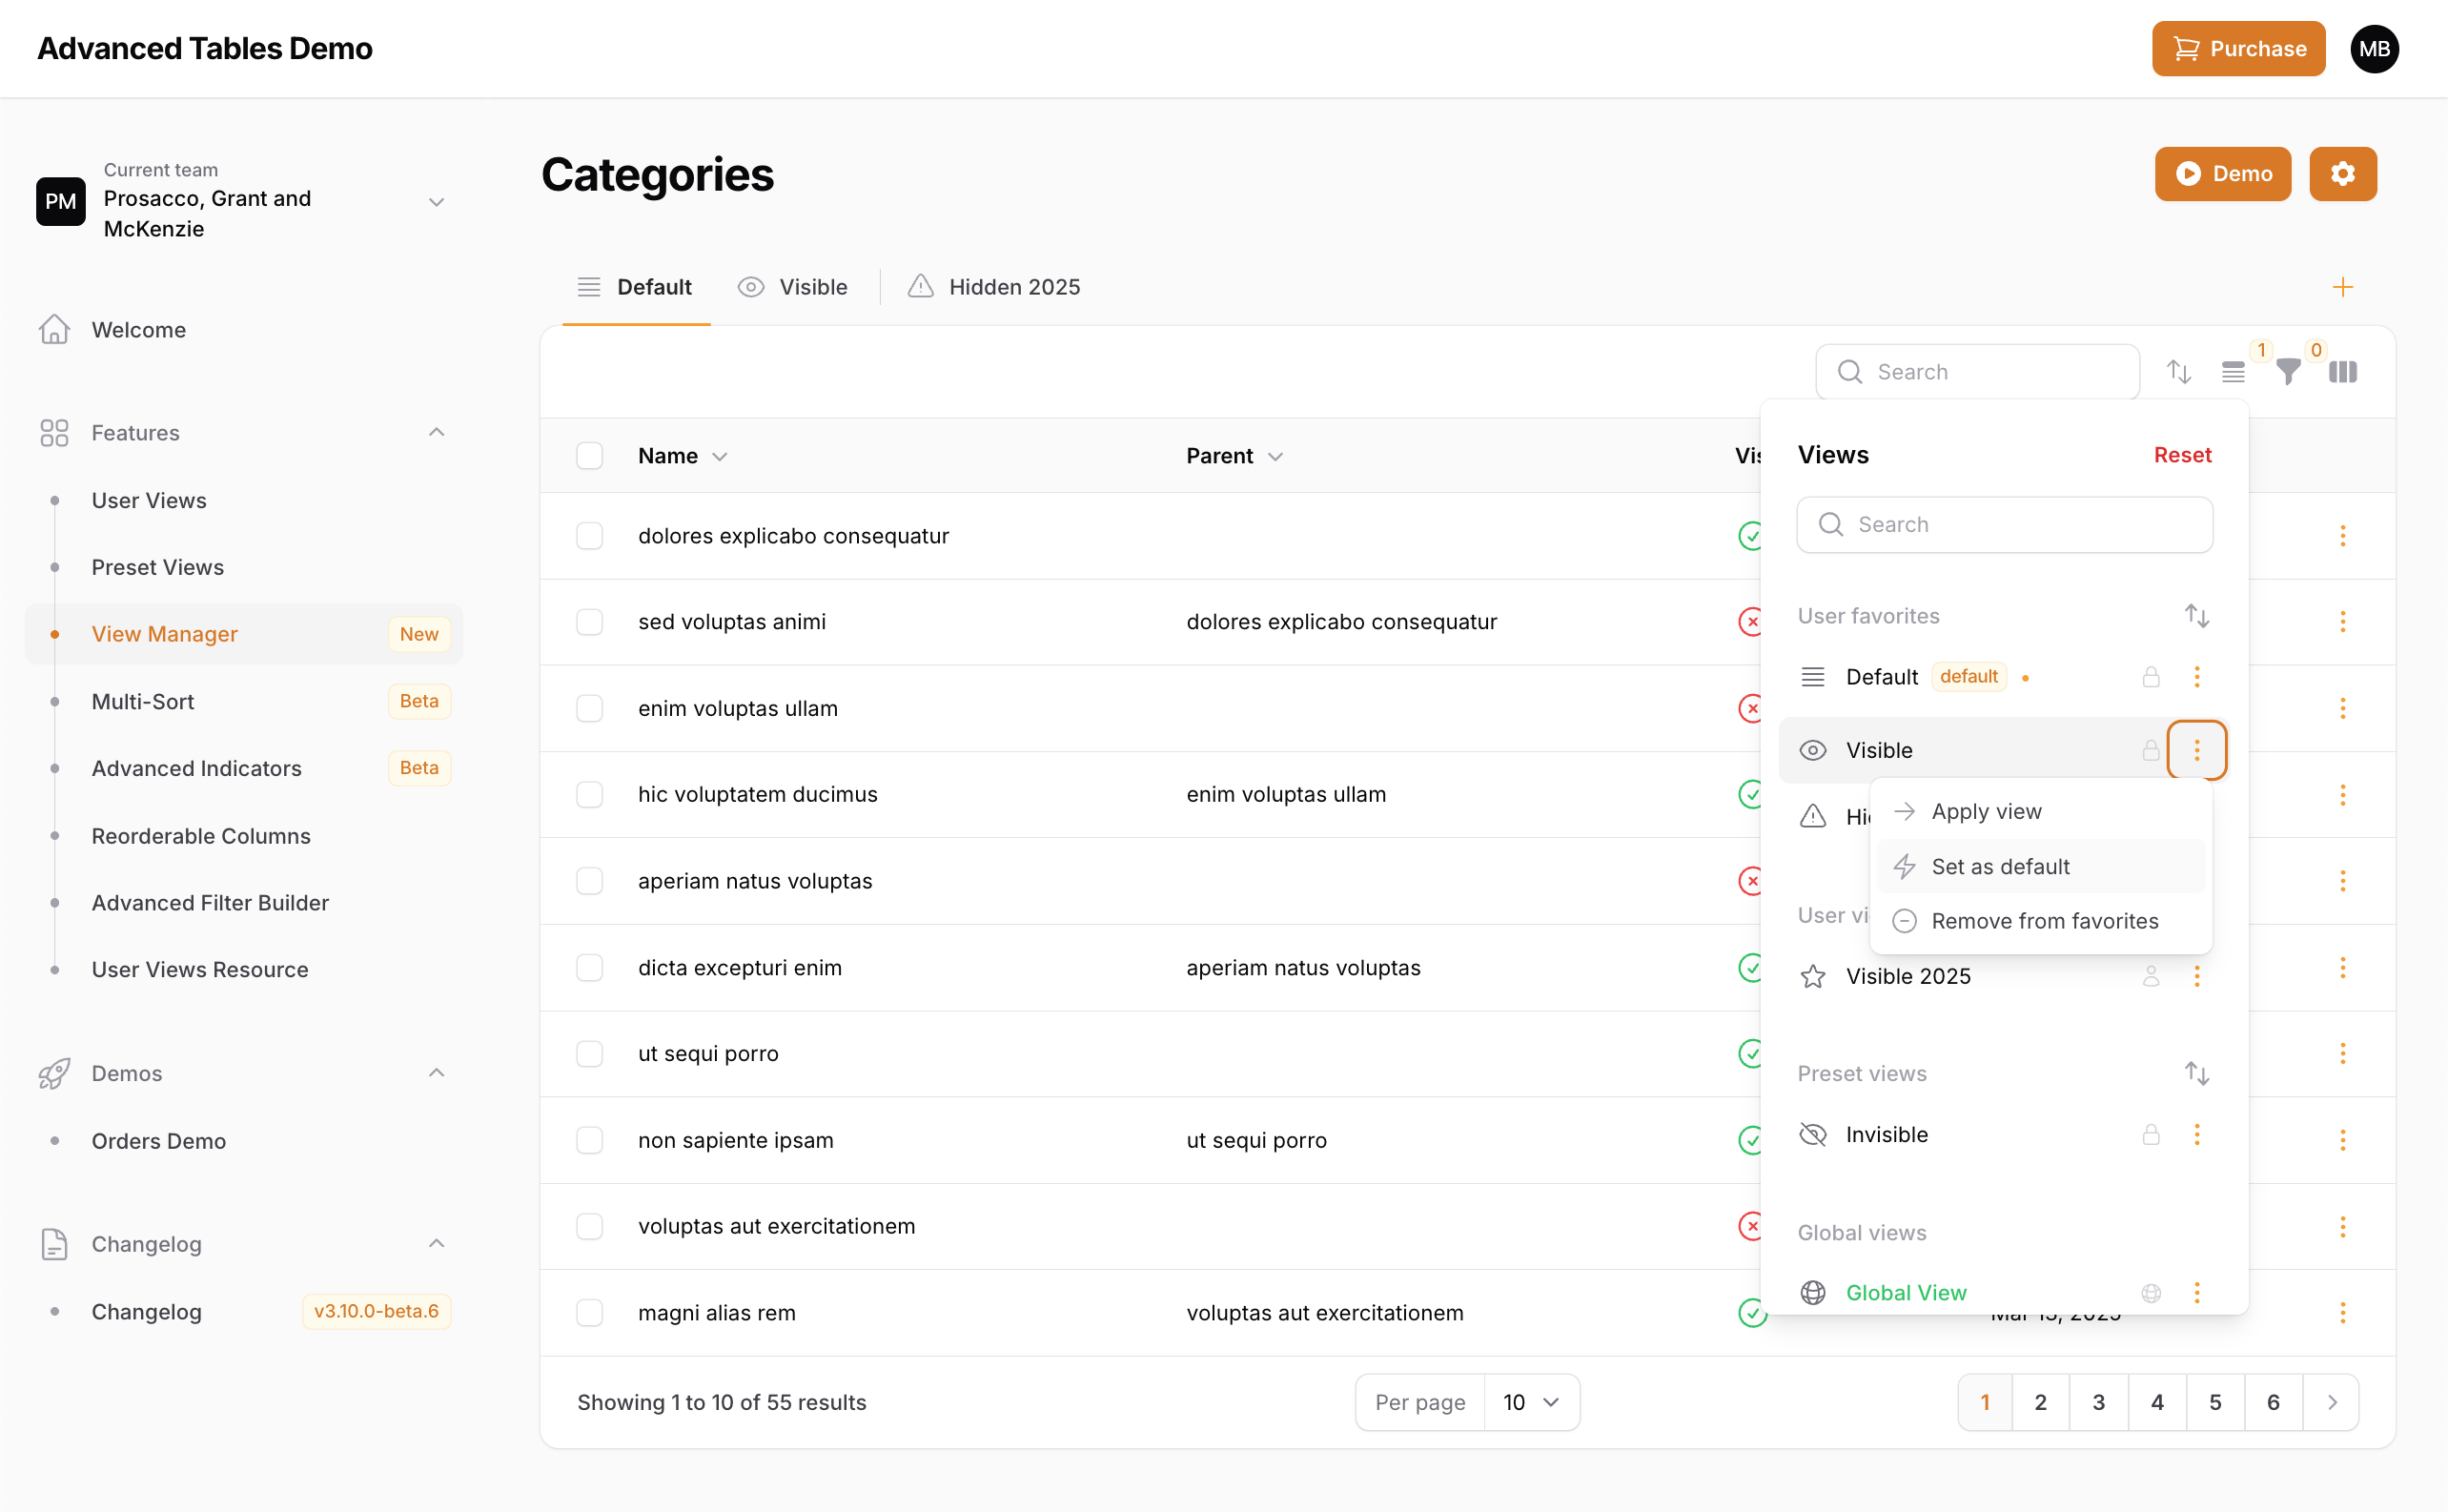
Using Managed Default Views
To use Managed Default Views:- Open the View Manager.
- Next to the view you would like to make default, click the action group button then choose, “Set default”.
- You may also remove a view as a default view. If there is a matching developer-defined default Preset View, it will become the new default.
UX Recommendation
Advanced Tables comes with an basic “Default” view that is automatically added to each table. However, this default view is an internal “view” and does not display in the View Manager. To offer the clearest UX to your end-users and the best compatibility with Managed Default Views, it is recommended to disable this internal default view, and to add a default Preset View to each of your pages. You can accomplish this by:-
Disable the internal default view:
-
Add a default Preset View to your list pages:
Note: Starting in the upcoming v4, the internal default view will be removed in favor of a default Preset View.